Sunday, July 31, 2011

Reese's Peanut Butter Bars

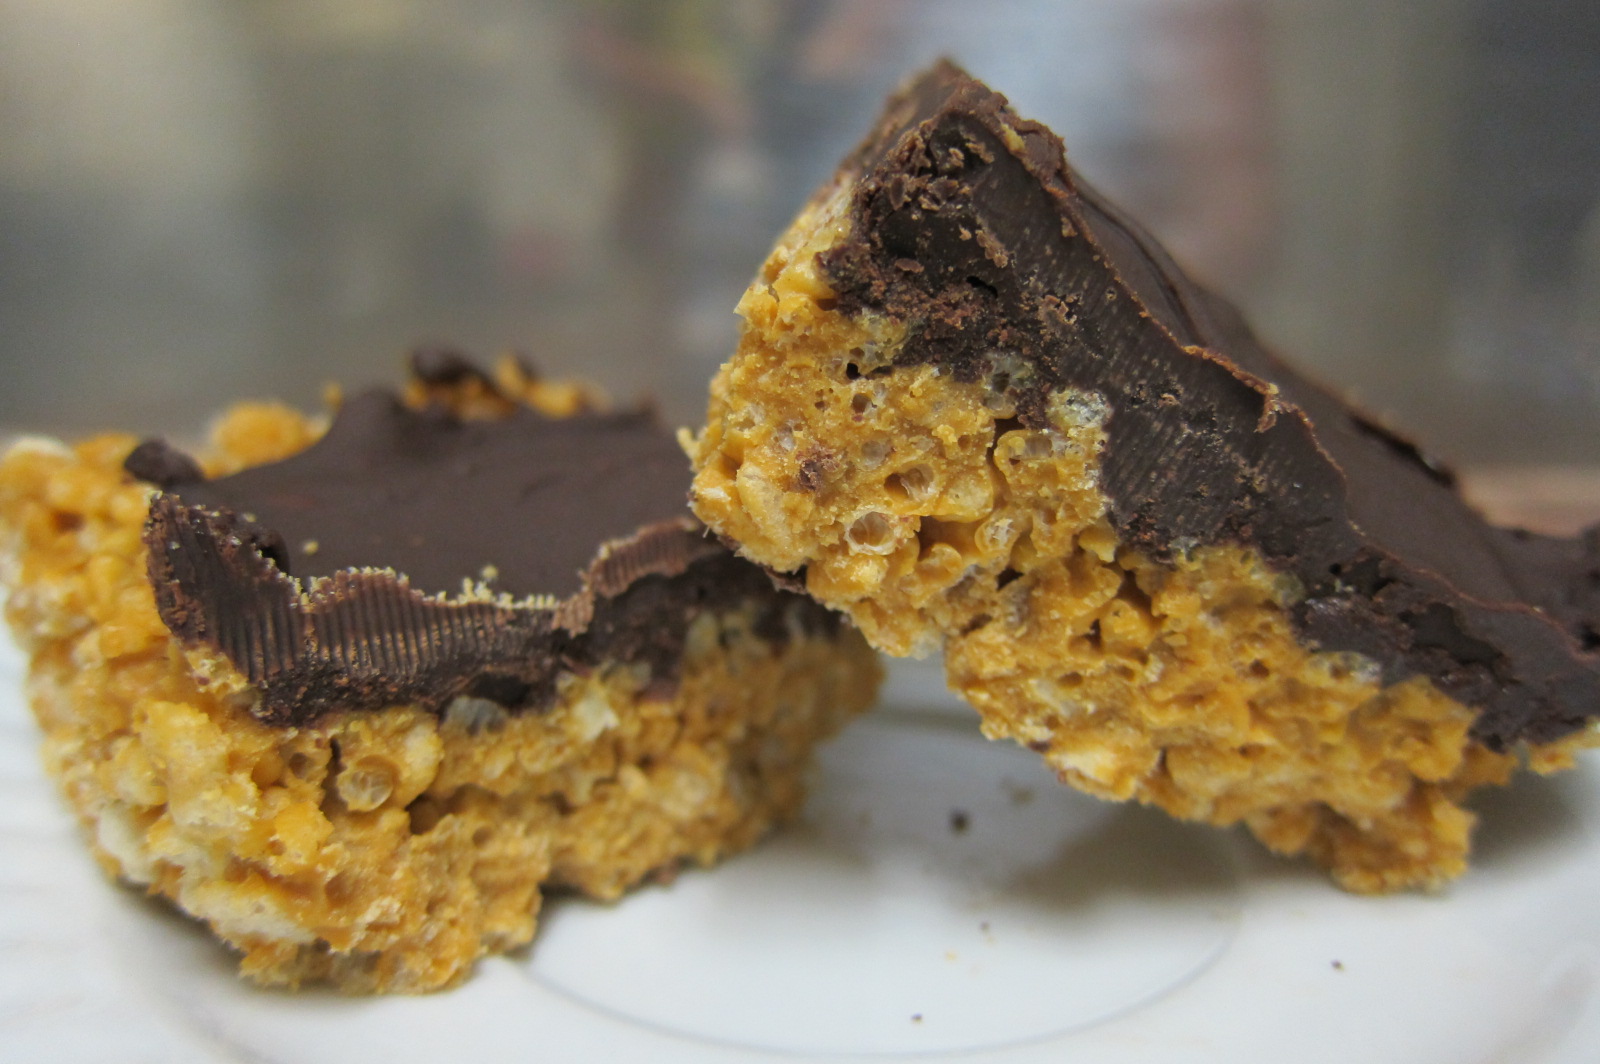
I love cookie bar recipes and feel I just don't make them enough.  If I had to choose a favorite candy bar it would be either Reese's Peanut Butter Cups or Milky Way Midnight.  I decided I needed to make a dessert with these candy bars.  Today I bought a bunch of Reese's Peanut Butter Miniatures and figured I'd decide what to do with them once I got home.  I thought why not make it into a cookie bar, it is quick, easy and delicious.  I just made my normal chocolate chip cookie dough recipe with a bit less chocolate chips and in the middle did the entire pan with Reese Miniatures then topped it with more cookie dough.  I love that you cut into it and see the hunks of peanut butter and chocolate from the melted Reese's!

Reese's Peanut Butter Bars

1 c. shortening or butter
3/4 c. brown sugar
3/4 c. white sugar
1 tsp. vanilla
2 large eggs
2 1/4 c. all-purpose flour
1 tsp. baking powder
1 tsp. baking soda
1 1/2 c. semi-sweet chocolate chips
Pinch of salt
1 1/2 bags of Reese's Miniatures

Preheat the oven to 375 degrees.  Combine shortening/butter and sugars in a bowl and mix until combined.  Add in the vanilla and one egg at a time beating until well combined.  In another bowl add the flour, baking powder, baking soda and salt and whisk until combined.  Pour flour into egg/sugar mixture until just combined and add the chocolate chips. Spread half of the cookie dough into a square pan (I think mine was roughly 6X6ish).  Take the wrappers off all the Reese's and line up covering the entire pan.  Spread the remaining cookie mixture over the top covering the Reese's completely.  Bake roughly 25-30 minutes or until golden brown.  Allow to cool before cutting.    

Post shared with:

Sweet as Sugar Cookies


Thursday, July 28, 2011

Flank Steak Tacos

Since living in Japan we are quite limited in Mexican restaurants to choose from so I wanted to start working in making my own.  I will say we do have on Mexican restaurant right off base here in Yokosuka that is really good but still, it is nice to be able to do it myself.  I went all out and marinated a flank steak and thin sliced it, made homemade tortillas, homemade salsa and guacamole.  It was a good day in our house! This marinade was incredible.  One of the best I've ever had.  My 3 year old took the spoon and drank the meat "juice" off the plate!  She isn't big on meat but she devoured this. I served our tacos with sauteed onions, refried beans and queso fresco cheese.


Flank Steak Marinade

3 lbs. flank steak
1/3 c. white vinegar
1/2 c. soy sauce
4 minced garlic cloves
2 limes, juiced
1/4 c. olive oil
1 tsp. salt
1 tsp. black pepper
1 tsp. garlic powder
1 tsp. cumin
1 tsp. paprika
1 tsp. chili powder

Take out flank steak and use a fork to pierce holes in both sides.  Add to large ziplock bag.  Combine vinegar, soy sauce, garlic cloves, lime juice, olive oil, salt, pepper, garlic powder, cumin, paprika and chili powder in a small bowl and whisk until combined.  Pour over flank steak.  Allow to marinate at least 8 hours or overnight.

Place flank steak on aluminum foil on a baking sheet under high broil for about 10 minutes on each side.  Allow to rest 10 minutes.  This makes a 3lb. flank steak medium with just slight pink throughout.  Slice very thinly at an angle against the grain for best results.   


Guacamole

1 large avocado
1 lime, juiced
pinch of garlic powder
pinch of salt & pepper

Mash avocado with lime juice until the consistency and texture you like, add in the garlic powder, salt & pepper.  Keep plastic wrap on until ready to use.  Guacamole doesn't keep well so use very shortly after making.  Push the plastic wrap all the way down until it actually touches the top of the guacamole so the top doesn't turn brown.  

Homemade Salsa

3 whole tomatoes
1 whole spanish onion
1 dried ancho-chili
4 garlic cloves
lime juice
salt & pepper
1 jalapeno
Olive oil

Preheat oven to 450 degrees.  Core your tomato, and rough chop your onion, remove the top off your jalapeno and peel your garlic cloves.  Place tomato (whole), onion, jalapeno and garlic on a baking sheet and drizzle with olive oil, salt and pepper.   Roast roughly 20 minutes or until tender and very fragrant.  Meanwhile pour hot, almost boiling water in a bowl and place your dried ancho-chili pepper into the bowl to reconstitute the pepper.  Allow to sit at least 20 minutes in the water.  Once your remove your tomato and vegetables from the oven, allow to cool slightly and peel your tomato (personal preference).  Pour your tomato, jalapeno, onion, garlic into a blender.  Remove the top off your ancho pepper and add to blender as well.  Blend until desired consistency, whether smooth or chunky.  Add in lime juice and salt and pepper to taste.  If you like it really spicy add additional jalapenos.  I found one was just enough heat for me.  I didn't add cilantro to mine because I personally don't care for it, but if you like it, add it!

Homemade Flour Tortillas

Back in Washington I would always make a trip to our local Central Market store to buy fresh made flour tortillas.  I absolutely loved them and apparently got quite spoiled eating them.  Now that I'm here in Japan and have only the preservative loaded garbage ones you can buy already made at the grocery store I realized I could make my own or just never eat them again!  I was surprised at how easy this was to do and how fantastic they tasted.  I will never have to buy tortillas again!  I don't know if the "resting" periods are absolutely necessary but with 2 small children everything I make ends up with lots of "resting"!


Homemade Flour Tortillas

3 c. all purpose flour
2 tsp. salt
2 tsp. baking powder
3/4 c. shortening or lard
3/4 c. warm water

Combine flour, salt and baking powder in a bowl.  Add in shortening or lard and use a pastry cutter, fork or your hands to work the shortening into the flour until it turns into a course mixture almost like sand.  Then pour in the water and use your hand or wooden spoon and mix/stir until a rough dough forms.  Add flour to your work surface and knead the dough for a few minutes until a more defined dough ball forms.  Cover and allow to rest 45 minutes.  Rip the dough ball into roughly 12 pieces and roll into small balls and cover and allow to rest another 30-45 minutes.  Heat a cast iron skillet to a medium to medium high heat.  Roll each dough ball very thinly.  You can separate with plastic wrap or parchment paper if you roll them all before cooking them.  Throw one onto your cast iron skillet and allow to cook for about 30 seconds each side until slightly brown spots form.  You may have to work with the temperature settings.  Some stoves you'll need it higher where others will need it lower.  You want to cook it until barely brown and still pliable, not crisp and not burnt.  Remove and place in a tortilla warmer or hand towel and keep covered to keep it warm.  Best used the same day.  You can also freeze with parchment paper in between and pull out and cook as needed.

Fruit & Nut Granola

I love granola and love that it is such a quick easy thing to make and you can throw anything you like into it.  No one in my house eats it but me but that's certainly alright with me because that just means there is more for me!  I normally like to use cranberry juice but didn't have any on hand so used a bit of orange juice instead and I really liked the hint of orange flavor it gave it.  You can always modify your granola recipe to include your favorite goodies!
Fruit & Nut Granola

2 c. old fashioned oats
1/2 c. dried cherries
1/2 c. dried cranberries
1/2 c. sweetened coconut
1/2 c. chopped pecans
1/2 c. chopped almonds
1/4. c. honey
1/4 c. maple syrup
1/8 c. brown sugar
1/8 c. orange juice
2 tsp. cinnamon

Place honey, syrup, brown sugar and orange juice in a saucepan on medium-low heat until sugar is dissolved.  Toss oats, dried fruit, nuts and coconut into a bowl.   Add cinnamon and toss to combine.  Pour syrup mixture over the top.  Bake 300 degrees for 20-30 minutes.  Pull out of the oven and stir every 10 minutes to prevent burning.  Allow to cool completely before storing. 


Sunday, July 24, 2011

Mama's Rice Krispy Treats

Growing up my mom always made rice krispy treats for us kids.  Though her version wasn't the version most people know.  We don't use marshmallows in our rice krispy treats.  I personally love this kind and have never and will never make the kind with marshmallows.  Since I am so very far from home being in Japan and all and I'm such a mama's girl I wanted to make something that reminded me of my mom and home a bit.  Being so far away makes me miss my mom more than I usually do!  My mom use to put the chocolate in the middle but I did it on the top instead just because I didn't have a ton of time to make these because the kids wanted to go to the park.  These are awesome and I personally think once you have this rice krispy treat you'll never care about the ones with marshmallows again!  And did I mention these are super simple and quick to make! I crumbled my rice krispys just a bit instead of leaving them completely whole but that is just a personal preference and isn't necessary.  Also you can adjust the amount of butterscotch chips if you want.  I like to add a few extra ounces in there then what the recipe actually calls for just for extra butterscotch deliciousness! 

Mama's Rice Krispy Treats
 
8 c. rice krispy cereal
1 c. creamy peanut butter
12 oz. butterscotch chips
24 oz. dark chocolate

Place your rice krispys in a food processor and pulse about 5 times just to break them up a bit.  About 4 cups at a time will fit.  Or place in a large ziplock bag and smash just a bit.  You don't want crumbs just to break it up a bit.  Melt the peanut butter and butterscotch chips in a double boiler.  Pour over the rice krispys and stir until completely coated.  Pour onto a greased 8x10 pan and place in the fridge to cool and allow to start to set.  Next melt the chocolate (I used dark because I like it better) in a double boiler and just pour the melted chocolate over the top of the rice krispys until the entire top is coated.  It is easier to pour and spread if the rice krispys have cooled a bit first.  Then just place in the fridge until completely cooled and set and then cut into bars.

Saturday, July 23, 2011

Cookie Dough Truffles

After I made these cookie dough truffles I asked my husband on a scale of one to ten what he thought of them.  He gave them an eleven!  The night I made them, I got up in the middle of the night to find my husband in the kitchen giggling to himself while eating one.  If you knew my husband you'd know, he doesn't giggle.  Manly men don't giggle, but I swear to you, it sounded much like a giggle to me.  He said he thought about bringing some to work with him but they were so good he didn't want to share them.  So, with that being said, these were definitely a hit.  My daughter added the sprinkles as her special touch to them because she is 3 1/2 and feels everything needs sprinkles.  These were relatively simple to make as I did it all while holding my 1 year old.   

Cookie Dough Filling:

3/4 c. brown sugar
3/4 c. white sugar
1 c. shortening (or room temp. butter)
4-5 tbsp. milk
1 tsp. vanilla extract
2 c. semi-sweet chocolate chips
2 1/4 c. all-purpose flour

Coating:

12 oz. dark chocolate
Sprinkles

Cream the shortening and sugar together until light in color.  Add in the vanilla and milk.  Stir in the flour and then the chocolate chips until combined.  Roll into about a teaspoon size ball and place on a baking sheet lined with parchment paper and place in the freezer for about 30 minutes.  Meanwhile melt the dark chocolate over a double boiler.  Take the cookie dough balls out of the freezer and dip into the melted chocolate mixture and place back on the parchment paper.  I leave my chocolate on a low temperature so that the chocolate doesn't start to harden again while I'm dipping the dough into it.  I also just use my fingers as I find it isn't too hot and easier to do that way while holding a baby.  Once you place back on the parchment paper sprinkle your sprinkles or roll in a topping of choice.  I would have liked to melt some colored chocolate, white chocolate or peanut butter and drizzled it over the top but my daughter over ruled me with the sprinkles.  Place in the fridge until firm.  Enjoy.

Thursday, July 21, 2011

Chocolate Birthday Cake

Today is my little boy's 1st birthday!  We did celebrate it 2 days early though because of my husband's work schedule but I just can't believe Nathan is 1 already.  I baked a cake for him and a separate one for us.  Gotta have the "smash cake" for the first birthday. I have a couple of chocolate cake and chocolate frosting recipes I've used before but wanted to try a new recipe this time.  The cake and frosting were both really good just lighter than what I normally make.  That isn't a bad thing I suppose I just have an insatiable sweet tooth and always find the sweeter the better.  The frosting was creamy and silky but again I like my sweeter chocolate buttercream made with powdered sugar.  This was one of those recipes that I liked but have others I like better.   Also this recipe makes a TON of cake.  It is an Ina Garten recipe and is used for a three tier cake.  I did two small cake pans and two 8 inch cake pans and it easily made all four of those and I had more than enough frosting for it all too.  I'm not the best with cake decorating (and by not the best I mean I'm quite terrible at it) but tried to make it pretty enough to be smashed to pieces!    

 Chocolate Birthday Cake: 

3 1/2 cups all-purpose flour
2 cups cocoa powder
1 tablespoon baking soda
1/2 teaspoon kosher salt
1 1/2 cups (3 sticks) unsalted butter, at room temperature
1 1/3 cups granulated sugar
1 1/3 cups light brown sugar, packed
4 large eggs, at room temperature
4 teaspoons pure vanilla extract
2 cups buttermilk, at room temperature
1 cup sour cream, at room temperature
1/4 cup brewed coffee

Preheat the oven to 350 degrees F.
Butter two 8 inch cake pans and two 3 inch cake pans. Line the bottoms with parchment paper, and butter and flour the pans. Sift the flour, cocoa, baking soda, and salt together in a medium bowl. In the bowl of an electric mixer fitted with a paddle attachment, cream the butter and sugars on high speed until light, approximately 5 minutes. Add the eggs and vanilla and mix well. Combine the buttermilk, sour cream, and coffee. On low speed, add the flour mixture and the buttermilk mixture alternately in thirds, beginning with the buttermilk mixture and ending with the flour mixture. Mix the batter only until blended. Divide the batter between the three pans and smooth the tops with a spatula. Bake on the middle rack of the oven approximately 25-30 minutes for the small pans and 30-35 minutes for the 8 inch pans or until a toothpick comes out clean . Cool the cakes in the pans for 10 minutes each on a cooling rack, carefully remove from the pans and allow to finish cooling.  Once cool frost the top and sides of that layer with buttercream. Spread any remaining buttercream over the cake evenly. 

Chocolate Buttercream Frosting:
1 pound bittersweet chocolate
12 ounces semisweet chocolate
3/4 cup egg whites (4-5 large eggs), at room temperature
1 1/2 cups granulated sugar
1/4 teaspoon cream of tartar
3/4 teaspoon salt
1 1/2 pounds unsalted butter, at room temperature
3 teaspoons pure vanilla extract

 
Chop the chocolates and place them in a heat-proof bowl set over a pan simmering water. Stir until melted and set aside until cooled to room temperature. Mix the egg whites, sugar, cream of tartar, and salt in the bowl of an electric mixer fitted with a whisk attachment. Place the bowl of egg whites over the pan of simmering water and heat the egg whites until they are warm to the touch, about 5 minutes. Return the bowl to the electric mixer and whisk on high speed for 5 minutes, or until the meringues cool and holds a stiff peak. Add the butter, 1 tablespoon at a time, while beating on medium speed. Scrape down the bowl, add the melted chocolate, vanilla and mix for 1 minute or until the chocolate is completely blended in. If the buttercream seems very soft, allow it to cool, and beat it again.

Garlic Breadsticks

So I decided I needed to stop making so many desserts all the time.  Of course the problem with that is I immediately just switch to making breads.  Not sure which one is worst for my waistline, homemade breads or desserts.  I'm pretty sure both are equally terrible for me as I tend to eat way too much of them in one sitting!  I made these tonight for the first time.  I was wanting a bread stick like the one you get at Olive Garden and since I'm in Japan I can't really go to Olive Garden so had to make my own.  I think these turned out awesome.  I loved them, so did my husband and kids.  Definitely a home run and will be making these again and again!  Plus my kids loved helping me shape these into bread sticks. 

Breadstick Dough

1 package active dry yeast
4 1/4 c. all-purpose flour,plus more for dusting
3 tbsp unsalted butter,softened
2 tbsp. sugar
1 tbsp. salt
1 1/4 c. warm water + 1/4 c. 

Topping:

3 tbsp. unsalted butter,melted
1/2 tsp. salt
1/8 to 1/4 tsp. garlic powder 
Pinch of Italian Seasoning
Make the dough: Place 1/4 cup warm water in the bowl of a mixer; sprinkle in the yeast and set aside until foamy, about 5 minutes. Add the flour, butter, sugar, fine salt and 1 1/4 cups plus 2 tablespoons warm water; mix with the paddle attachment until a slightly sticky dough forms, 5 minutes.

Knead the dough by hand on a floured surface until very smooth and soft, 3 minutes. Roll into a ball and place in an oiled bowl and cover.  Allow to rise for about 1 1/2 hours or until doubled in size.  I then turned mine out onto a floured surface and pressed to a square and used a knife to cut long strips in the shape of bread sticks.  I didn't actually measure the size, just guessed how big I wanted them.  Then placed each bread stick on a baking sheet on parchment paper that I sprayed with Pam.  Cover again and allow to rise until almost doubled, about 1 hour.

Preheat the oven to 400 degrees. Make the topping by melting the butter and then adding the garlic powder, salt and Italian seasoning into the butter mixture then brushing the bread sticks with it before placing in the oven and right after they come out as well.  Bake approximately 15 minutes.

Wednesday, July 20, 2011

Whisking Wednesdays #12

Photobucket

Welcome to Whisking Wednesdays! 

What a week here.  We had an earthquake then a typhoon barely missed us.  It is super windy out and has been raining on an off all week because of this storm.  It is my son's first birthday tomorrow, though we celebrated it yesterday because of  my husband's long 12 hour work days and he was off work yesterday.  We had a ton of fun.  Both my little ones are sick though so that always sucks.  But I've been in the kitchen cooking up a storm which always puts me in a good mood. 


The top three from last week's Whisking Wednesday are below.  You are welcome to grab a feature button if you'd like.  Thank you all for visiting and sharing your recipes!

Did you say stuffed?  A stuffed cinnamon roll with cookie dough and chocolate all in one?  I mean cinnamon rolls, you can't get much better than those but then adding cookie dough and chocolate all into the same recipe!  


YUM!  Peanut butter, chocolate and rice krispies.  These look awesome.  Reminds me slightly of a childhood recipe my mom made except it was peanut butter and butterscotch in the base.  Gonna have to make my variation of these this week in honor of my mom now that I've seen these. 


#2


These cupcakes look so refreshing.  Or maybe it is because lemonade is so refreshing it makes me think these have got to be refreshing.  What a wonderful summer cupcake, raspberries and lemonade.  I love lemon in everything so I'm sure these are amazing. 


#3


The Rules:
  1. Please link up to the URL of your post, not the URL of your main blog. When it asks for "Name", type in the name of your recipe.
  2. Please leave a link back to this post in your post or Grab My Button.
  3. Share your delicious recipes from this week. You are welcome to link up multiple recipes.
  4. Leave me a comment and let me know that you've linked up.
  5. Please visit at least two others and comment on the goodies they've added to this party.
  6. Also, I would love for you to follow me but it isn't a requirement.  
This weeks theme is going to be just your favorite recipe you've made from the week.  Whether it is a dessert, breakfast, dinner or snack.  

      Photobucket

      Photobucket


      Some Japan Favorites

       So these dumplings are called "gyoza".  I LOVE these things.  Everywhere we go I order them for an appetizer for us.  My husband actually likes them too which is always a surprise because he isn't big on trying new things.  My 1 year old really loves them too but that isn't saying much as he'll eat just about anything.  They have a cabbage, onion, minced or ground pork filling and are just awesome dipped in a bit of soy sauce.  Many stores you can walk buy and actually see them hand making these dumplings inside.  Did I mention that I think soy sauce here in Japan is about 100 times better than the states, not sure why that is.  Maybe it is just my imagination. 

      Another thing that you can get just about everywhere here is ramen.  There are so many different types I don't even know where to begin.  Especially since I'm a ramen beginner.  I've tried ramen quite a few times in the two months I've been here and find that almost all of it is really good.  My daughter who won't eat anything will even eat ramen now.  One of these days I'll learn the differences between all these ramen dishes but right now I'm just enjoying them.  The big green thing in it is a sheet of seaweed. 


      This is chop suey.  I wasn't sure about it because it had a bunch of misc. seafood pieces in it that I still cannot tell you what it was I ate exactly and you can choose between crunchy or soft noodles and I got crunchy because this was my first time eating it and I didn't really know what I was ordering anyways.  I was really surprised at how good this was.  I won't say it was a favorite or anything but just something I tried, and enjoyed and remembered to take a picture of. 

      The picture below is a picture of a Japanese oven.  They have basically two stovetop burners and a pull out thing to cook fish in.  They don't actually have an oven like we are use to.  I wouldn't know what to do with myself if I had to use one of these and couldn't really bake like I'm use to. 

      I find that the more I get out into town and do things the more comfortable I am with it.  It is amazing at how many people speak English or at least can speak English so much better than I can Japanese.  We went to a store recently that is much like the Home Depot in the states except it is two stories high and has a furniture store on the top part.  It also had a McDonald's in the store.  So we figured we'd get the kids some lunch while we were there shopping.   It is McDonald's so how hard can it be to order, right?  Well everyone's order turned out fine except mine.  It seems anytime I attempt to communicate things myself things go wrong but I find it amusing and just figure I'll try again next time to get it right.  They have a Teriyaki Burger at the McDonald's here.  It looked really tasty.   So I attempted to order the Teriyaki Burger with no mayonnaise or lettuce and ended up with just a plain burger with absolutely no sauce whatsoever.  Oops, better luck next time! 

      Tuesday, July 19, 2011

      Happy 101 Award

      So I've been honored with receiving the "Happy 101" award from Grandma Loys Kitchen!  I feel so special and it just puts a smile on my face to know that someone enjoys my blog and thought of me to pass this on too.   

      Ok, so here are the rules for this award:
      1.  Copy the award image into a post.
      2.  List 10 things that make you happy.
      3.  Tag 10 bloggers who brighten your day.
      4.  Put in a link to their blogs.
      5.  Notify the award receivers.
      6.  Recipients should link back to the sender’s blog. 
      So the first being ten things that make me happy.  I'm a pretty happy person so that should be a breeze to make that list.

      1.  My children
      2.  My husband
      3.  My family (mom, sister, dad, niece, nephew)
      3.  Baking
      4.  My new apartment
      5.  Having the opportunity to live and explore a new country (Japan)
      6.  Making new friends
      7. This amazing warm sunny weather here in Japan.  Sunshine always makes me smile.
      8.  My sister is having a baby boy!
      9. New fruits and vegetables to try here in Japan
      10.  And one that is quite ridiculous but my husband will tell you how true it is, spending money.  Spending money always makes me happy and puts me in a good mood!

      Next, 10 bloggers that brighten my day.

       1.All Things Erika

      Ok, so this one probably shouldn't be my first but it is.  This is my sister's blog.  My very pregnant sister.  I'm in Japan and she is in Maryland with her husband, my niece and my new nephew on the way.  So her blog helps me to stay connected to her and I love seeing what she is up to.
       
      2.  Chef in Training

      I love this blog.  I find the recipes on here to be absolutely incredible and the pictures amazing.  I don't think I've seen one single picture that I didn't want to eat!  

       3.That Skinny Chick Can Bake

      I love the recipes on this blog.  Not only do all the pictures look so very professional and fancy but she does things with the pictures that I'd never even be able to think of!  Also, I find it amazing that she is so skinny (yeah, hence her blog name) but has the most amazing desserts she makes all the time!  I don't know how she does it!

      4. Crayon Freckles

      I love this blog.  Not only the design and layout but I love the fact that there is so much stuff on there geared towards her role as a mom and crafts and things she does with her child.  I also love the crafts in general as I find that I wish I could recreate some of them but I'm not that craft.  

      5. Sweet As Sugar Cookies

      There are so many amazing recipes on this blog.  I love that there is so many sweet treats but also lots of really interesting things like BBQ Meatballs that I can't wait to make! 

      6. Grandma Loys Kitchen

      This blog has some great recipes and has such a nice homey feel to it.  Grandma's always make you feel comfy and homey!

      7. Debbie Debbie Doos 

      I love the newby parties on her site every week as I think many of my followers found me through this site and can't thank her enough for it!

      8. At Home with Haley


      Another blog with amazing recipes and pictures.  I also love the weekly link-up party!

      9. For the Love of Cooking

      This blog has so many dinner ideas.  A lot of the recipes are simple and tasty and I always check this blog out when I'm looking for ideas for dinner. 

      10.  Sugar and Dots

      I'm posting this blog because I find it so difficult to get my daughter to eat fruit for some reason.  She absolutely LOVED the shark watermelon that was on this blog recently and asked me to buy her a watermelon so we could make this shark together and swears she is going to eat it.  So fingers crossed on her actually eating it.  I love the link party on this blog too!

      I'm totally thrilled with this award and wish my kids would give me a bit more time to say nice things about all the blogs I love but unfortunately I've got two sick kiddos right now and a 1st birthday party for my son I'm trying to make a cake for so my hands are so very full.   But I want to thank everyone that reads and visits my blog and tell you how much it means to me!

      Wednesday, July 13, 2011

      Banana Muffins

      I had a few bananas on my counter that desperately needed to be eaten or used today so I decided to do some Banana Muffins.  Not only because it is such a simple, quick recipe to make but it makes your entire house smell just amazing.  If you want you can substitute some or all of the butter for applesauce to make it a lighter muffin as well as switching out the all purpose flour for whole wheat or using half whole wheat.  I wanted to do whole wheat but realized that they don't have whole wheat pastry flour at my only store here on base and I'd bet my life you can't get whole wheat pastry flour at one of the local grocery stores in town in Japan. Granted, even if I was standing there looking directly at it I wouldn't have a clue what it was since I can't read Japanese!  Looks like that is one of those items I'm going to have to have my mom ship to me from the states because I love using it and don't really want to go three years without it!

      Banana Muffins


      2 c. flour
      3/4 c. sugar
      3/4 tsp. baking soda
      1/2 tsp. salt
      4 small very ripe bananas, mashed
      1/4 c. fat-free vanilla yogurt
      2 large eggs
      6 tbsp. unsalted melted butter
      1 tsp. vanilla extract

      Preheat oven to 350 degrees.  Grease your muffin pan.  I like to grease it with butter.  Whisk flour, sugar, baking soda, and salt together in large bowl.  Mash the bananas in a separate bowl.  Add the yogurt, eggs and vanilla into the bananas and whisk until combined. Then pour in the butter to the banana mixture while whisking.  Make sure your butter isn't piping hot but has cooled a bit. Pour the banana mixture into the flour and whisk until just combined.  This is a thick and chunky batter so you may want to stir with a wooden spoon instead of a whisk at this point.  Use a 1/3 c. measuring cup and scoop into muffin pan.  This makes 9 good sized muffins.  Bake 22-25 minutes or until golden brown and a knife can pierce the muffin and comes out clean.

      Red Velvet Brownies

      I was in the mood to make something different than your regular brownie yesterday so I did a red velvet brownie with a cream cheese swirl.   My swirl didn't turn out very swirly but these weren't a hit.  My husband loved them and so did my daughter.  My 1 year old chased me around the house hoping I'd give him a bite.  The cream cheese taste is subtle but really made a big difference in the taste of the brownie.  I like fudgy brownies so I baked mine for about 25 minutes and then cooled in the fridge until set.  If you like it more cake like I'd cook for about 30 or so minutes. 

      Red Velvet Brownie

      1 stick melted butter
      1 c. sugar
      1 tsp. vanilla
      1/4 c. cocoa powder
      pinch of salt
      1 tbsp. red food coloring
      1 tsp. white vinegar
      2 eggs
      3/4 c. flour
      1/2 tsp. baking powder

      Cream Cheese Swirl:

      3 oz. cream cheese
      3 c. powdered sugar
      1 tsp. vanilla
      1 egg

      Preheat the oven to 350 degrees.  Butter an 8 by 8-inch baking pan, and set aside.

      For the brownie, melt the butter in a saucepan. Remove the butter to a large bowl and add the sugar, vanilla, cocoa powder, salt, food coloring and vinegar mixing between additions. Whisk the eggs in a small bowl and stir it into the cocoa mix. Fold in the flour and baking powder until lightly combined. Pour the batter into the prepared baking pan, saving 1/4 cup of the batter for the top.  For the cream cheese swirl blend together the cream cheese, powdered sugar, egg and vanilla in a medium bowl until creamy and no lumps.  Gently spread the cream cheese layer on top of the brownie batter in the pan.  Dollop the remaining brownie batter over the cream cheese layer. Using a skewer or the tip of a knife, drag the tip through the cream cheese mixture to create a swirl pattern. Bake the brownies for 25-30 minutes. Remove from oven and allow them to cool completely before cutting.

      Post Shared With: 
      At Home with Haley 

      Chicken Verde Quesadillas

      I love this really super simple dinner recipe.   My husband is now working 12 hour day shifts two days a week then 12 hour night shifts two days a week.  So with him not getting home until 9pm two nights a week I wanted to find dinners that are easy but tasty to make for me and the kids and then be able to reheat or quickly put together for him when he gets home at night.  A friend of mine told me about a verde chicken enchilada she makes and I've been hooked on verde salsa since I tried it.  You can make the chicken ahead of time or use a rotisserie chicken.  I make my own taco seasoning but packet works just as well, I just don't usually have it on hand so find it easier to just make my own when I need it. 

       Chicken Verde Quesadillas

      3-4 boneless skinless chicken breasts
      1 packet of Taco seasoning
      2 tbsp. olive oil
      1 jar of verde salsa
      1/4 c. sour cream
      quesco fresco cheese
      1 c. mexican shredded cheese
      6-8 tortillas

      Preheat the oven to 375 degrees.  Place the chicken breast on a baking sheet and liberally cover with taco seasoning and drizzle with olive oil.  Then turn the chicken over and repeat making sure to massage the taco seasoning into the chicken.  Bake the chicken for 25-30 minutes (depending on how thick your chicken is).  Then shred the chicken.  In a bowl mix the entire jar of verde salsa (minus a bit if you want to drizzle it on top or dip it) with about 1/4 c. sour cream and about 1/4 c. queso fresco cheese.  Add the chicken to the verde sour cream mixture.  Heat a large skillet on medium and spray with non-stick spray.  Place a tortilla down and then spread the chicken verde mixture onto the quesadilla (liberally) and sprinkle the shredded Mexican cheese on top and cover with another tortilla.  After 3-4 minutes flip and cook the other side until crispy.  Cut into wedges and serve.  

      Whisking Wednesdays #11

      Photobucket

      Welcome to Whisking Wednesdays!


      What a week.  Blazing hot heat, beaches, pools and finally all my stuff unpacked and getting organized.  I'm loving the heat and this Summer has been amazing so far.  I hope you all are having a wonderful Summer as well and getting some lazy time in by the pool now and again.   

      The top three from last week's Whisking Wednesday are below.  You are welcome to grab a feature button if you'd like.  Thank you all for visiting and sharing your recipes!

      These Sweet and Sassy Sliders look so perfect.  I would have never thought they were a dessert!  They look so much like the real thing.  I'm not sure if I could make them so perfect!  I'm just in awe over them.  
      #1
      The Seven Year Cottage
      Sweet 'n Sassy Sliders


      I love meatballs and have never tried BBQ ones.  This recipe looks awesome.  I love the use of ground turkey and homemade BBQ sauce.  A definite must try for this Summer.

      #2
      Sweet as Sugar Cookies
      BBQ Meatballs


      Everyone knows grilling goes hand in hand with Summer.  There are few things better than a big juicy steak.  I'm a big fan of marinating our steaks before we grill them and this marinade looks great, and come on, so does that big juicy steak!

      #3
      The Kitchen Cookie
      Steak Marinade


      The Rules:
      1. Please link up to the URL of your post, not the URL of your main blog. When it asks for "Name", type in the name of your recipe.
      2. Please leave a link back to this post in your post or Grab My Button.
      3. Share your delicious recipes from this week. You are welcome to link up multiple recipes.
      4. Leave me a comment and let me know that you've linked up.
      5. Please visit at least two others and comment on the goodies they've added to this party.
      6. Also, I would love for you to follow me but it isn't a requirement.  
      This weeks theme is going to be just your favorite recipe you've made from the week.  Whether it is a dessert, breakfast, dinner or snack.  

          Photobucket

          Photobucket


          Sunday, July 10, 2011

          Red, White & Blue Cake

           I'm a bit late with this but since I was unable to make anything patriotic for Memorial Day or the Fourth of July because of moving to Japan and not having my stuff and all I felt like I had something to make up for.  This is my Red, White & Blue cake.  My husband thought it was a bit clownish but I felt it had just the right amount of patriotism added to it!  I found a recipe that was similar to this one but it was boxed cake and melted whipped frosting from a can and I don't like either.  So I decided I'd make the cake and frosting from scratch.  Granted the frosting didn't really look the way the original picture I was shooting for in thin drizzly lines but that's because I decided to make a buttercream frosting instead of a whipped frosting.  My daughter loved helping me with all the colors in the cake and frosting, especially since I very rarely use dye in my food.  I'm not big on dye but I made an exception. 

          I think I over did it on the frosting just a tad though because it was hard to taste the cake over the insanely sweet layers of red, white and blue buttercream, but I'll never complain about something being too sweet.  Here in Japan the desserts simply aren't sweet.  Every time I eat one I feel like they must have forgotten to add the sugar.  But, hey that is part of what I love about being an American, I can use as much sugar as I want!  

          Classic White Cake:
          1 c. room temp. milk
          6 egg whites
          2 tsp vanilla extract
          2 1/4 c. all-purpose unbleached flour (or cake flour)
          1 3/4 c. sugar
          4 tsp. baking powder
          1 tsp. salt

          3/4 c. (6 oz), softened
          Red & Blue food coloring

          Preheat oven to 350 F.  Grease a bundt pan with vegetable shortening and flour the pan. Combine milk, eggs whites and extracts in a small bowl with a fork. Set aside. Combine flour, sugar, baking powder and salt in an electric mixer and mix at slow speed with a paddle attachment. Add butter. Continue beating at slow speed until mixture looks like wet sand Add all but 1/2 cup of milk mixture and beat at medium speed for 1 1/2 minutes. Add remaining milk mixture and beat for an additional 30 seconds, scraping the sides of the bowl if necessary. Do not overmix.  Divide batter evenly in three separate bowls.  Leave one white, add red dye to the other and blue dye to the third.  I actually needed the entire bottle of red and blue but mine were mini-sized bottles.  Bake 45-55 minutes, until toothpick inserted into the center comes out clean.  Allow cake to cool completely before frosting.  

          Vanilla Buttercream Frosting: 


          1/2 c. shortening
          1/2 c. room temp. butter
          2-3 tbsp. half and half
          4 c. powdered sugar
          1 tsp. vanilla extract
          Red & Blue food coloring


          Add all ingredients into a mixer with whisk attachment and beat on low speed until combined.  Then turn to medium low and beat until fluffy and desired consistency.  Separate into three bowls, add red & blue to two bowls until desired color.  I spooned mine into a zip lock baggie and cut the corner to get a stream of frosting for easier application to the cake.

          This post shared with: 

          Chocolate Chip Cookies

                I love chocolate chip cookies.  Who doesn't?  One of the first things I did once we got all of our furniture and I was unable to unpack my kitchen was bake a huge batch of chocolate chip cookies and take them to all my neighbors and introduce myself.  I love baking and love having someone to give whatever I bake to as my husband just can't seem to eat all of what I make.  Guess I get carried away sometimes and make too much.  This is my "go to" chocolate chip cookie recipe.  I love bittersweet chocolate chips in my cookies, I think it just tastes better than semi-sweet.  I like to use a combination of dark chocolate and bittersweet.  I like cakey gooey cookies, not crisp ones so I usually use shortening and baking powder in addition to the baking soda.  However, you could use 1/2 butter 1/2 shortening or all butter.  If you like yours more crispy, omit the baking powder.  


                Chocolate Chip Cookies
                 
                2 1/4 c. all-purpose unbleached flour
                1 ½ tsp baking powder
                ½ tsp. baking soda
                1/4 tsp salt
                1 c. shortening
                3/4 c. granulated sugar
                3/4 c. packed dark brown sugar
                1 tsp. vanilla extract
                2 large room temp. eggs
                1 1/2 c. dark chocolate chips
          1 1/2 c. bittersweet chocolate chips

          Preheat oven to 375 degrees.  Cream shortening and white and brown sugar together until light and fluffy in color, medium speed approximately 4-5 minutes.  Add one egg at a time and vanilla.  In a separate bowl sift flour, salt, baking powder and baking soda together.  Add into sugar mixture and beat until just combined.  Add in the chocolate chips.  Spoon onto parchment paper and bake 8-10 minutes or until edges are just golden.  

          Tuesday, July 5, 2011

          Whisking Wednesdays #10

          Photobucket

          Welcome to Whisking Wednesdays!


          Yikes, I didn't do so well with my link party this last week.  I think me not being able to spend time on the computer is effecting this negatively. Thank God my furniture will be delivered in two days and I will have a semi-normal life back again and can spend time on here again!  

          I hope you all had an amazing Fourth of July!  

          The top three from last week's Whisking Wednesday are below.  You are welcome to grab a feature button if you'd like.  Thank you all for visiting and sharing your recipes!

          Who doesn't love a jumbo cookie with candy!?  This looks so yummy!  Plus I love the colorful candy in it.  I also really like the combination of shortening and butter in a cookie as it gives it the best of both worlds. 
          #1
           The Sweet Detail
          Jumbo Candy Cookies 


          I've never made a trifle before and this one looks super chocolately and I love the homemade brownies in this.  Plus it looks so pretty.  All these delicious layers of chocolate and pudding and whip cream and such, yum!

          #2
          Chef in Training
          Died and Gone to Heaven


          I love egg casseroles.  I have one of my all time favorite egg casserole recipes on my blog here somewhere but I just adore them.  So this one looks fantastic and hope to try it soon as I'm always looking for something tasty to do with eggs!  Plus, I'm a huge fan of anything that is usually for breakfast and having it at dinner!

          #3
          Talking Dollars and Cents
          Breakfast Casserole for Dinner


          The Rules:
          1. Please link up to the URL of your post, not the URL of your main blog. When it asks for "Name", type in the name of your recipe.
          2. Please leave a link back to this post in your post or Grab My Button.
          3. Share your delicious recipes from this week. You are welcome to link up multiple recipes.
          4. Leave me a comment and let me know that you've linked up.
          5. Please visit at least two others and comment on the goodies they've added to this party.
          6. Also, I would love for you to follow me but it isn't a requirement.  
          This weeks theme is going to be just your favorite recipe you've made from the week.  Whether it is a dessert, breakfast, dinner or snack.  

              Photobucket

              Photobucket